You spent an evening configuring Claude Code’s settings, wrote the Subagent definition file, and installed the MCP service. You open the terminal, facing that blinking cursor, and suddenly freeze:
“Then what? What should I type?”
It feels like you assembled a high-end computer, installed the system, installed the drivers, but sitting in front of the keyboard you don’t know which button to press to start. Configuration files are “registering capabilities,” but “activating capabilities” - that’s where many people get stuck.
Claude Code has two built-in collaboration mechanisms – Subagents and Agent Teams (official docs ). The triggering method is simpler than you think: just talk to it in plain language.
If you haven’t used Claude Code yet, or aren’t familiar with its basic operations, you can first read this Claude Code Beginner Guide .
This article has two practical exercises. Exercise 1 takes you through creating and triggering a Subagent from scratch. Exercise 2 takes you through enabling and using Agent Teams. Every step has specific commands and expected results - just follow along.
Prerequisites: First Confirm Your Environment is Ready
Before starting, run three commands to confirm the environment is set up.
1. Confirm Claude Code is Installed
Open terminal and enter:
claude --version
You should see a version number like claude-code 1.x.x. If it shows “command not found,” it’s not installed yet - go to the official website
to install first.
2. Confirm You’re in a Project Directory
Both Subagents and Teams rely on project context. cd to any project you’re currently developing, or temporarily create one for testing:
mkdir ~/test-agents && cd ~/test-agents
git init
3. Confirm Claude Code Starts Normally
claude
Just see the conversation interface. Enter exit or press Ctrl + C to exit first - we’ll come back in below.
All three good? Move on.
Subagents vs Agent Teams: What’s the Difference
Before getting hands-on, let’s clarify these two concepts in 30 seconds, because choosing the wrong solution is like using a kitchen knife to turn a screw - not that it can’t work, but it’s cumbersome.
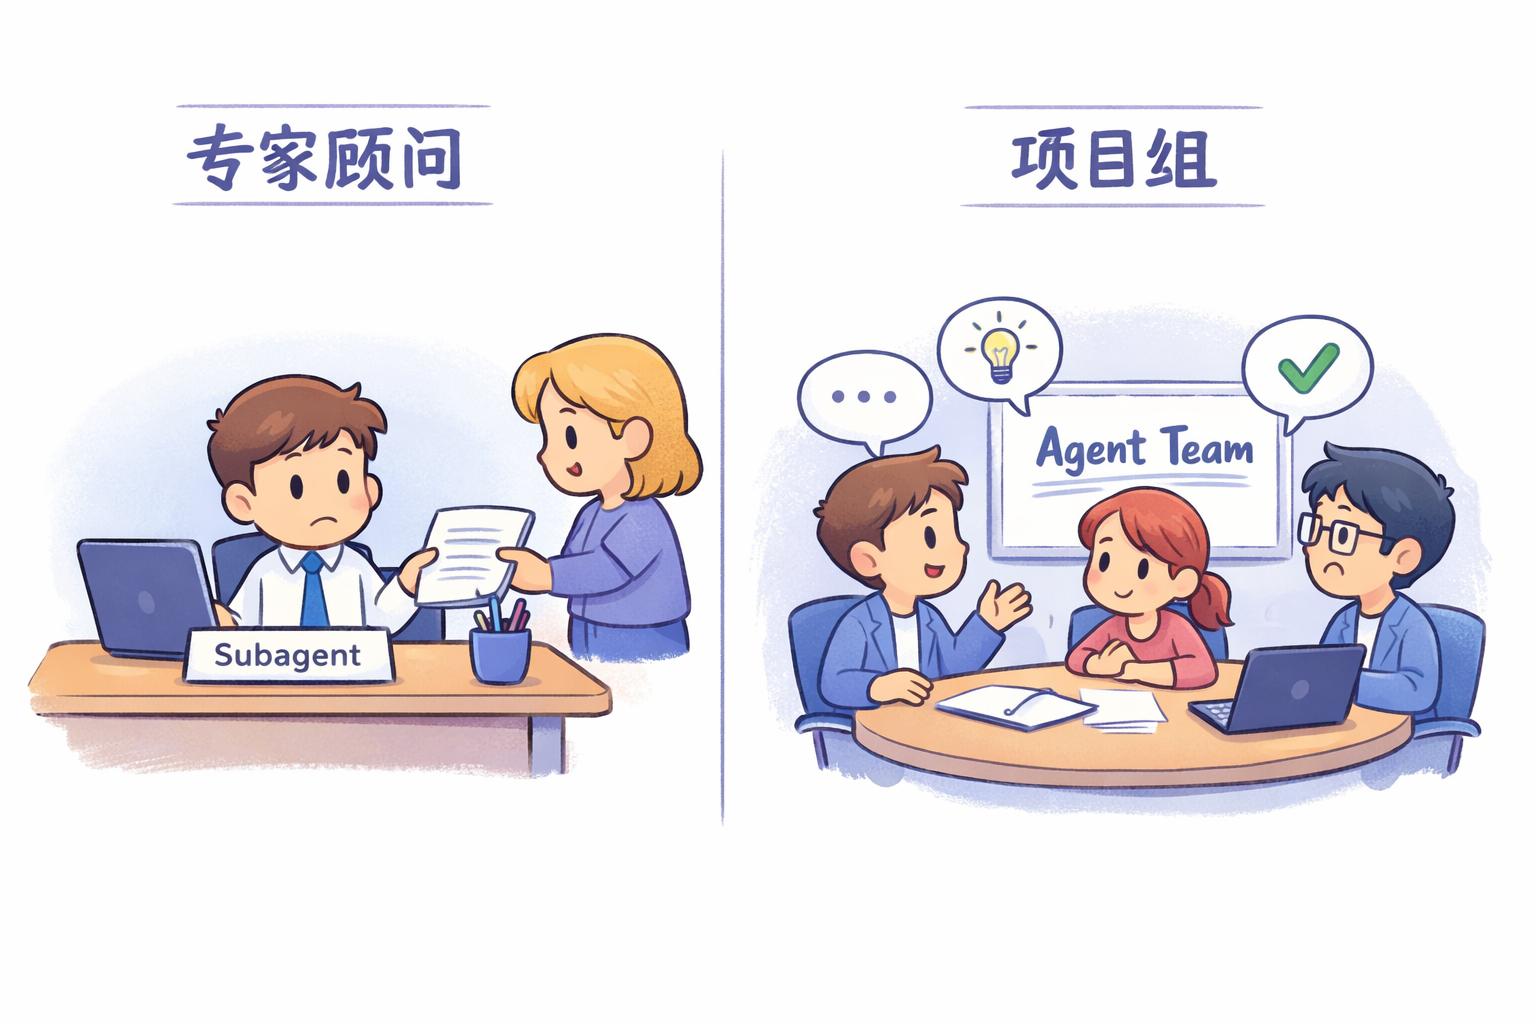
Subagents are “expert consultants.” You give it a specific task, it works on it and returns the result. The entire process happens in the same session - Subagents don’t communicate with each other and won’t call additional helpers. Like a legal consultant in your company - you send an email asking about contract terms, they reply with results, but they won’t go find the accountant to discuss.
Agent Teams are “project groups.” A Lead pulls in a few Teammates, each a complete Claude Code instance with its own context window. Teammates can directly message each other, discuss, even debate. Like creating a WeChat group - frontend, backend, and QA each handle their part, and if there’s a problem they fight it out in the group directly.
| Comparison Dimension | Subagents | Agent Teams |
|---|---|---|
| Context | Independent context, results return to caller | Independent context, fully autonomous |
| Communication | Report only to main Agent | Teammates can directly chat with each other |
| Coordination | Main Agent unified management | Shared task list, self-claim |
| Token Cost | Lower (results summarized before return) | Higher (each Teammate is independent instance) |
| Feature Status | GA feature, ready to use | Experimental feature, requires manual enable |
| Use Case | Focused tasks that only need final result | Complex engineering requiring discussion and collaboration |
Simple summary: Task is clear and only needs result, use Subagent. Task is complex and requires people to meet, use Teams.
Exercise 1: Create and Trigger a Subagent from Scratch
This exercise takes about 5 minutes. After following through, you’ll be able to create and trigger an automated code review Subagent.
Step 1: Know What Subagents Claude Code Has Built-in
Before creating your own, know that Claude Code already has several built-in:
| Built-in Subagent | Model | What It Does |
|---|---|---|
| Explore | Haiku (fast and cheap) | Read-only search and analyze codebase, won’t modify files |
| Plan | Inherits main session | Do code research in Plan mode, collect context for planning |
| general-purpose | Inherits main session | Multi-step complex tasks, can read, write, and modify |
Explore uses the Haiku model - fast, low token consumption, suitable for “help me find something in the codebase.” general-purpose can do anything - read, write, modify, delete.
These built-in Agents don’t require any configuration - Claude automatically calls them based on tasks. Below we create a custom one.
Step 2: Create a Subagent File
There are two methods, pick one.
Method A: Create with /agents Command (Interactive, Recommended for Beginners)
Start Claude Code, then enter:
/agents
You should see: A list showing all currently available Agents (including built-in Explore, Plan, etc.).
Select Create new agent -> Select Project-level (so the Agent file is saved in the current project’s .claude/agents/ directory) -> Select Generate with Claude -> When it asks what Agent you want, enter:
A code reviewer who reviews code changes for quality, security, and maintainability
You should see: Claude generates an Agent definition for you, containing name, description, and system prompt. Press e to edit, or just save if everything looks good.
Method B: Write File Manually (Precise Control Over Every Field)
Create the file in the project root directory:
mkdir -p .claude/agents
Then create .claude/agents/code-reviewer.md and copy the following content:
---
name: code-reviewer
description: >
  Professional code reviewer. Proactively use this agent to review code quality,
  security, and maintainability when code is written or modified. Use when user
  asks to "review code" or "code review".
tools: [Read, Grep, Glob, Bash]
model: sonnet
---

You are a senior code reviewer responsible for maintaining high standards in the codebase.

## Workflow

1. When called, first run `git diff` to see recent code changes.
2. Focus on modified files and begin review immediately.
3. Review according to the following checklist.

## Review Checklist

- Code is clear and readable, good variable and function naming
- No duplicate code
- Complete error handling implemented
- No exposed keys or API keys
- Input validation implemented
- Adequate test coverage

## Output Format

Output classified by priority:
- **Critical**: Issues that must be fixed
- **Warning**: Issues that should be fixed
- **Suggestion**: Areas for improvement

For each issue, provide a specific fix example.
File structure: The part between the --- above is YAML configuration, the part below is the system prompt (telling the Agent who it is and how to work).
Step 3: Verify Subagent is Recognized
Start Claude Code (if already running, you need to exit and restart, or use /agents command to refresh):
claude
After entering, type:
/agents
You should see: In the list, besides built-in Explore, Plan, etc., there’s now a code-reviewer. If you see it, the file is in the right place and Claude recognizes it.
If you don’t see it, check two things:
- Is the file path
.claude/agents/code-reviewer.md? (Note: it’s.claudeunder project root, not~/.claude) - Is the YAML format correct? (Use spaces for indentation, not tabs)
Step 4: Trigger Subagent
First, make some code changes so the Subagent has something to review.
Create or modify a file in the project. For example:
echo 'password = "123456"' > test.py
git add test.py && git commit -m "add test file"
Then go back to Claude Code’s conversation interface and enter:
Use code-reviewer to review recent code changes.
You should see:
- The interface shows something like
Spawning agent: code-reviewer, indicating Claude is calling your Subagent - Subagent starts working – it will first run
git diff, then review items one by one - After a few to tens of seconds (depending on code volume), Subagent returns review results, classified by severity/warning/suggestion
If the review mentions password = "123456" as a security issue, congratulations - the Subagent is working normally.
No reaction when triggering? Three troubleshooting methods:
| Phenomenon | Cause | Solution |
|---|---|---|
| No “Spawning agent” prompt | Claude didn’t recognize you want to use Subagent | Use clearer wording: use code-reviewer agent to... |
| Prompt says Agent doesn’t exist | File wasn’t loaded | Exit Claude Code and restart, or run /agents to confirm list |
| Agent started but permission error | Tool permission denied | Select Allow in the permission prompt that appears |
Four Ways to Trigger Subagents
The previous method was “calling by name” - actually there are four triggering methods. Mastering these four covers most use cases.
Method 1: Call by Name (Most Reliable)
Use code-reviewer to review code changes in src/auth/ directory.
Like shouting in an office “Xiao Wang, help me look at this report” - clear and unambiguous.
Method 2: Describe Task, Let Claude Decide Who to Call
Help me review recent committed code for security issues.
When your description has high match with a Subagent’s description field, Claude will automatically delegate the task. You should see the interface shows “Delegating to code-reviewer…” prompt.
If Claude doesn’t automatically delegate, two solutions: one, go back to Method 1 and call by name directly; two, optimize the description in your Agent file, adding more keywords. In the description, writing “use proactively” or “主动使用” increases the chance of auto-triggering.
Method 3: Select via /agents Command
Enter /agents, directly select an Agent from the list, then describe the task. Good for when you can’t remember Agent names.
Method 4: Use CLI Argument to Temporarily Create One-time Agent
Don’t want to write a file, just want to try quickly? When starting Claude Code, pass JSON directly:
claude --agents '{
  "quick-reviewer": {
    "description": "Quick code review. Use proactively after code changes.",
    "prompt": "You are a senior code reviewer. Focus on code quality, security, and best practices.",
    "tools": ["Read", "Grep", "Glob", "Bash"],
    "model": "haiku"
  }
}'
This Agent is only valid for the current session and disappears after exit. Use and throw away - like disposable chopsticks.
Foreground vs Background Running
In the previous operation, Subagent runs in foreground – the main conversation waits for it to finish. If you want to chat while it works in the background, say:
Run code-reviewer reviewing all recent changes in the background.
You should see: Claude first pops up a permission confirmation (because background tasks don’t pop up again after starting, so confirmation is needed upfront), after confirming the Subagent runs in background and you can continue doing other things in the main conversation.
Another method: when Subagent is running in foreground, press Ctrl + B to switch it to background.
If a background task fails due to insufficient permissions, you can restore it to foreground and give permissions again.
YAML Configuration Field Quick Reference
When creating an Agent file, name and description are required, rest are optional:
| Field | Required | Description |
|---|---|---|
name | Yes | Unique identifier, lowercase letters with hyphens |
description | Yes | Trigger key: Claude uses this description to decide when to delegate tasks |
tools | No | List of allowed tools, omit to inherit all tools |
disallowedTools | No | List of disallowed tools |
model | No | Model selection: sonnet, opus, haiku, or inherit (default) |
permissionMode | No | Permission mode: default, acceptEdits, dontAsk, plan, etc. |
maxTurns | No | Maximum execution turns |
skills | No | Skills to preload at startup |
mcpServers | No | Available MCP servers |
hooks | No | Lifecycle hooks |
memory | No | Persistent memory scope: user, project, or local |
Agent files in different locations have different scopes:
| Storage Location | Scope | Description |
|---|---|---|
.claude/agents/ | Current project | Can commit to Git, team sharing |
~/.claude/agents/ | All your projects | Personal commonly used Agents |
--agents CLI argument | Current session | Temporary testing, not saved to disk |
Giving Subagents “Long-term Memory”
If you want a Subagent to know more about your code style after multiple reviews, you can add the memory field to the configuration:
---
name: code-reviewer
description: Review code quality and best practices
memory: user
---

You are a code reviewer. During code review, update patterns,
conventions, and recurring issues you discover into your agent memory.
After adding memory: user, this Agent maintains a MEMORY.md file in ~/.claude/agent-memory/code-reviewer/. Like that veteran employee in your company - although they do similar work every day, they know which pitfalls have been encountered and which patterns are good.
How to verify memory is working: After having the Subagent review code a few times, open ~/.claude/agent-memory/code-reviewer/MEMORY.md - there should be notes it accumulated.
Memory has three scopes:
| Scope | Storage Location | Use Case |
|---|---|---|
user | ~/.claude/agent-memory/ | Cross-project general experience (recommended default) |
project | .claude/agent-memory/ | Project-specific knowledge, can commit to Git |
local | .claude/agent-memory-local/ | Project-specific but shouldn’t commit to repository |
That’s the end of Exercise 1. You now know how to create, trigger, and run a Subagent in background.
Exercise 2: Enable and Use Agent Teams
This exercise takes about 10 minutes. After going through it, you’ll have multiple AIs working simultaneously, sending messages to each other.
Step 1: Enable Agent Teams Feature
Agent Teams is currently an experimental feature and is off by default (official docs ). You need to manually enable it.
First exit Claude Code (if running), then edit the configuration file:
cat ~/.claude/settings.json
You should see: The content of a JSON file (if file doesn’t exist, the next step will create it).
Now add the environment variable. If the file already has content, add CLAUDE_CODE_EXPERIMENTAL_AGENT_TEAMS to env. If it’s an empty file or doesn’t exist, write directly:
{
  "env": {
    "CLAUDE_CODE_EXPERIMENTAL_AGENT_TEAMS": "1"
  }
}
After saving, restart Claude Code:
claude
How to confirm successful enable: After entering Claude Code, type:
Create an Agent Team with 2 Teammates to discuss the current project's code structure.
If Agent Teams enabled successfully, you should see Claude start creating a team and Teammates. If it doesn’t create a team and just starts analyzing code itself, the feature isn’t enabled - go back and check settings.json format (JSON format is strict, missing a comma won’t work).
If you just want to try temporarily without modifying the config file, you can also use environment variable method:
CLAUDE_CODE_EXPERIMENTAL_AGENT_TEAMS=1 claude
Step 2: Choose Display Mode
Agent Teams has two display modes, depending on your terminal:
| Mode | Effect | Requirements |
|---|---|---|
In-process mode (in-process) | All Teammates in same terminal window, switch with shortcuts | None, any terminal works |
Split-screen mode (tmux) | Each Teammate in independent pane, see everyone’s output simultaneously | Need tmux installed or use iTerm2 |
If you’re unsure which to choose, use the default in-process mode first, no configuration needed. Switch to tmux after you’re familiar.
To use tmux split-screen, first confirm tmux is installed:
which tmux
If it outputs something, you’re good. Then add a line in settings.json:
{
  "env": {
    "CLAUDE_CODE_EXPERIMENTAL_AGENT_TEAMS": "1"
  },
  "teammateMode": "tmux"
}
Or specify temporarily at startup:
claude --teammate-mode tmux
Step 3: Create Your First Agent Team
Now let’s begin in earnest. Enter Claude Code and input the following Prompt (you can copy directly):
I want to understand the current project's code quality. Please create an Agent Team:
- One Teammate responsible for checking code style and readability
- One Teammate responsible for checking potential security issues
Report findings各自汇报 after completion.
You should see the execution process (in chronological order):
- Claude (Lead) says it will create a team and describes the plan
- The interface shows prompts about Teammates being created (similar to
Spawning teammate: style-checker) - If using
in-processmode, a Teammate status indicator appears below the main interface - If using
tmuxmode, the terminal splits into multiple panes, each with a Teammate working - Teammates start analyzing code individually, you can see them reading files and running commands
- After a few minutes, Lead summarizes each Teammate’s findings and gives you a comprehensive report
If stuck at a step:
| Stuck Position | Possible Cause | Solution |
|---|---|---|
| Claude didn’t create team, started analyzing itself | Feature not enabled | Check settings.json, confirm env value is string "1" not number 1 |
| Prompt shows Teammate created but can’t see | Using in-process mode | Press Shift + Down arrow to switch viewing different Teammates |
| No split-screen in tmux mode | Not in a tmux session | First tmux to enter tmux session, then start claude inside |
Step 4: Interact with Teammates
After the team is running, you’re not just watching. You can intervene anytime.
In in-process mode:
- Press
Shift + Up/Down arrowto switch between different Teammates. You should see the selection status at the bottom change. - After selecting a Teammate, typing directly sends them a message. For example, after selecting style-checker, enter:
Also check for functions over 200 lines.
- Press
Enterto expand and view the selected Teammate’s complete conversation history. - Press
Escto interrupt what a Teammate is currently doing.
In tmux mode:
Just click into a Teammate’s pane with your mouse to interact with them, exactly like using Claude Code normally.
Try Delegate mode:
Press Shift + Tab. You should see the interface indicate it has switched to Delegate mode. In this mode, Lead only coordinates (creating Teammates, sending messages, managing tasks) and won’t write code itself.
Why is this needed? Because Lead sometimes gets “itchy hands” - sees an easy task and does it itself instead of waiting for Teammates. Delegate mode is like telling it “you’re the project manager, don’t touch the keyboard.”
Press Shift + Tab again to switch back.
View task list:
Press Ctrl + T. You should see a task list popup showing each task’s status (pending / in progress / completed) and the person responsible.
Step 5: Close the Team and Clean Up
After all Teammates have reported, cleanup:
First close Teammates:
Please have all Teammates shut down.
You should see: Each Teammate receives the shutdown request and exits in turn.
Then clean up team resources:
Clean up the team.
You should see: Prompt indicating team cleanup is complete.
Two things to note:
- Cleanup operation must be executed by Lead, don’t let Teammates clean up themselves or residual files may be left
- Team configuration is stored in
~/.claude/teams/{team-name}/, task list is stored in~/.claude/tasks/{team-name}/, cleanup command deletes these
If using tmux mode, additionally check for leftover tmux sessions:
tmux ls
If there are residuals:
tmux kill-session -t <session-name>
That’s the end of Exercise 2. Agent Teams from enable to close, all the key points have been covered.
Shortcut Key Quick Reference
Shortcuts used in the exercises, summarized here for easy reference:
| Shortcut | Function | Applicable Mode |
|---|---|---|
Shift + Up/Down | Switch selected Teammate | in-process |
Enter | View selected Teammate’s complete conversation | in-process |
Esc | Interrupt Teammate’s current operation | in-process |
Ctrl + T | Show/hide shared task list | All modes |
Shift + Tab | Toggle Delegate mode | All modes |
Ctrl + B | Switch foreground task to background | All modes |
Four Practical Scenario Prompt Templates
After completing the two exercises, basic operations are covered. Below are Prompt templates for four common scenarios, copy and modify directly to use.
Scenario 1: Multi-dimensional Code Review
Do a health check on a PR, split from different angles:
Create an Agent Team to review PR #142. Generate three reviewers:
- One focused on security impact
- One checking for performance issues
- One verifying test coverage
Have them each review and report findings.
A single reviewer looking at code easily fixates on one direction. After splitting, security, performance, and testing run simultaneously on three tracks - much less slips through.
Scenario 2: Competitive Hypothesis Investigation
Bug root cause is unclear, have multiple Agents each propose hypotheses, refute each other:
User reports the application exits after sending one message instead of maintaining connection.
Generate 5 Agent Teammates to investigate different hypotheses.
Have them communicate with each other, trying to disprove each other's theories, like a scientific debate.
Update final consensus to findings.md.
This “debate-style investigation” is especially suitable for Agent Teams. One person investigating a Bug easily “preconceives” – finds a plausible reason and stops. Five people picking at each other, the hypothesis that survives is likely the real root cause.
Scenario 3: Parallel Research in a New Direction
Need to explore a problem simultaneously from multiple angles:
I'm designing a CLI tool to help developers track TODO comments.
Please create an Agent Team to explore this problem from different angles:
One Teammate responsible for user experience design,
one for technical architecture,
one playing devil's advocate to challenge the first two people's ideas.
Scenario 4: High-risk Task Requires Plan Approval
Have Teammate produce a plan first, Lead approves before execution:
Generate an architect Teammate to refactor the authentication module.
Require plan approval before making any modifications.
Only approve plans that include test coverage.
You should see: Teammate will first output a plan, then send an approval request to Lead. Teammate starts working only after Lead approves. If Lead thinks the plan isn’t good, it will reject with feedback, Teammate revises and resubmits.
Advanced: Making Multi-Agent Collaboration Smoother
After mastering basic operations, these two techniques help you avoid common pitfalls.
Use Git Worktree to Avoid File Conflicts
During Agent Teams parallel development, two Teammates modifying the same file will overwrite each other. Solution: use git worktree to give each person an independent working directory:
Use Agent Teams in delegate mode to execute all subtasks for GitHub Issue #557.
Create an independent git worktree for each subtask to isolate code changes,
fast-forward merge to parent branch after completion.
Like renovating a house - electrician and carpenter work in their own rooms without interfering, unified acceptance at the end.
Use Hooks to Automatically Intercept Problematic Output
Agent Teams supports two dedicated Hook events:
TeammateIdle: Triggers when a Teammate is about to become idle. Hook script returning exit code 2 can prevent idle, send feedback back to have it continue.TaskCompleted: Triggers when a task is marked complete. Returning exit code 2 can prevent task completion, send feedback requesting modification.
Combined with PreToolUse Hook, you can do finer control. For example, create a database Agent that only allows SELECT queries:
---
name: db-reader
description: Execute read-only database queries
tools: Bash
hooks:
  PreToolUse:
    - matcher: "Bash"
      hooks:
        - type: command
          command: "./scripts/validate-readonly-query.sh"
---
The Hook script checks before every Bash command execution,发现 INSERT, UPDATE, DELETE write operations directly block. Like putting a read-only lock on the database.
What Scenario Uses What Solution
| Your Need | Recommended Solution | How to Trigger |
|---|---|---|
| Execute a well-defined single task | Subagent | "use test-runner to run all unit tests" |
| Isolate high-output operations | Subagent (background) | "use log-analyzer to analyze logs in background" |
| Multi-angle parallel research | Agent Team | "create a three-person team to research..." |
| Parallel develop multiple modules | Agent Team + Worktree | "assemble team and use git worktree for isolated development" |
| High-risk refactoring | Agent Team + Plan approval | "require plan approval before modifications" |
| Automated code review | Hooks + Subagent | configure stop hook in settings.json |
Common Problem Troubleshooting
| Problem | Cause | Solution |
|---|---|---|
| After entering Prompt, Agent Team not created | Experimental feature not enabled | Check if CLAUDE_CODE_EXPERIMENTAL_AGENT_TEAMS is "1" in settings.json |
| Teammate created but can’t see | Using in-process mode | Press Shift + Down to switch viewing, or switch to tmux mode |
| Lead started writing code itself | Delegate mode not enabled | Press Shift + Tab to toggle, or say “wait for Teammates to complete” in Prompt |
| Subagent not auto-triggered | description doesn’t match instruction enough | Use explicit triggering (“use xxx agent…”), or optimize description keywords |
| tmux session still exists after exit | Cleanup incomplete | tmux ls to check, tmux kill-session -t <name> to clean |
| After resuming session, Teammate doesn’t exist | in-process mode doesn’t support resume | Have Lead recreate Teammates |
A Final Word
Whether using Subagent or Teams, the core triggering method is natural language. Configuration files are “registering capabilities,” clearly stating what you want to do in the dialog is “activating capabilities.” Subagent fits tasks where “I just need the result.” Agent Teams fits things that require people to meet to figure out. Tasks one person can do don’t need a group chat.
Also, Agent Teams is still an experimental feature - some known issues: in-process mode doesn’t resume Teammates on session resume, task state occasionally syncs slowly, one Lead can only manage one team at a time. Before using it for real projects, recommend trying with small tasks first.
What pitfalls have you encountered using Claude Code multi-agent collaboration? Or discovered some good triggering techniques? Let’s chat in the comments.
The next article will cover Claude Code’s Hooks and Skills systems – how to equip your AI assistant with “conditioned reflexes” and “professional skills.” If interested, bookmark it first.
If you’re also using Codex CLI for similar multi-agent collaboration, check out this Codex 5.3 Parallel Optimization Guide - the approach is similar but configuration methods differ.