Precision Control! One JSON Template Makes AI Image Generation 100% Obedient
Table of Contents
- See the Results First, Pictures Speak Louder
- Why Do Your Prompts Always Fail?
- 6-Layer Structure to Build Your Prompt Framework
- Layer 1: Style Definition (Style) - Determines the Image’s “Flavor”
- Layer 2: Subject Shaping (Subject) - The Image’s “Protagonist”
- Layer 3: Environment & Props - Supporting “Actors” Creating Atmosphere
- Layer 4: Lighting - Light and Shadow are Photography’s Soul
- Layer 5: Camera - Simulating a Photographer’s Perspective
- Layer 6: Post-processing - Simulating Retouching Effects
- Complete Template One-Click Copy
- Combat Tips: 3 Tricks to Double Your Results
- Common Problem Pitfall Guide
- Next Steps
Have you ever experienced this: you have a stunning image in your mind, but when you input it into an AI image tool, what comes out is a “expectation vs reality” disaster?
It’s like telling your hairdresser “just trim a little” and ending up with “starting over from scratch”…
Where’s the problem? It’s not that AI is bad, it’s that your “prompts” are too vague.
Today I’ll break down a JSON prompt template that can precisely control AI, making Gemini and Doubao obediently generate TikTok-style retouched portraits.
See the Results First, Pictures Speak Louder
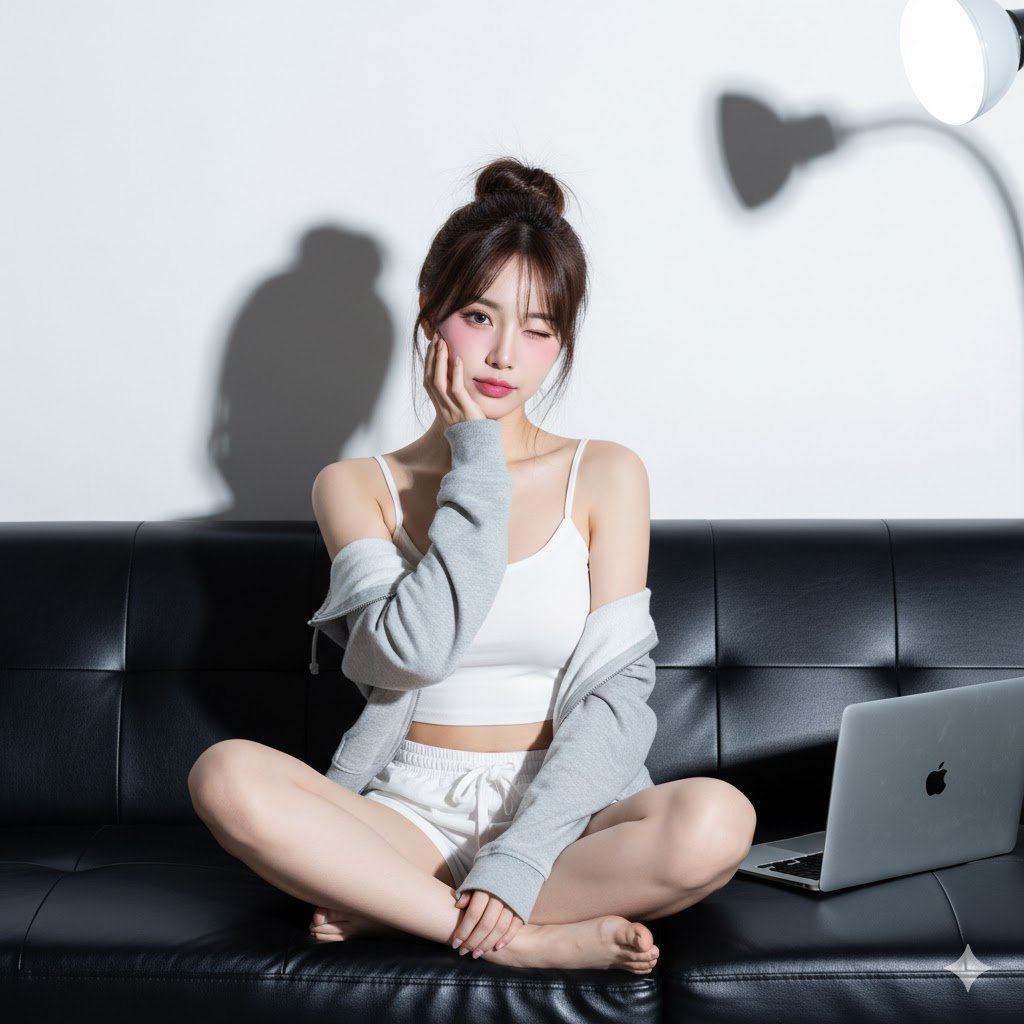
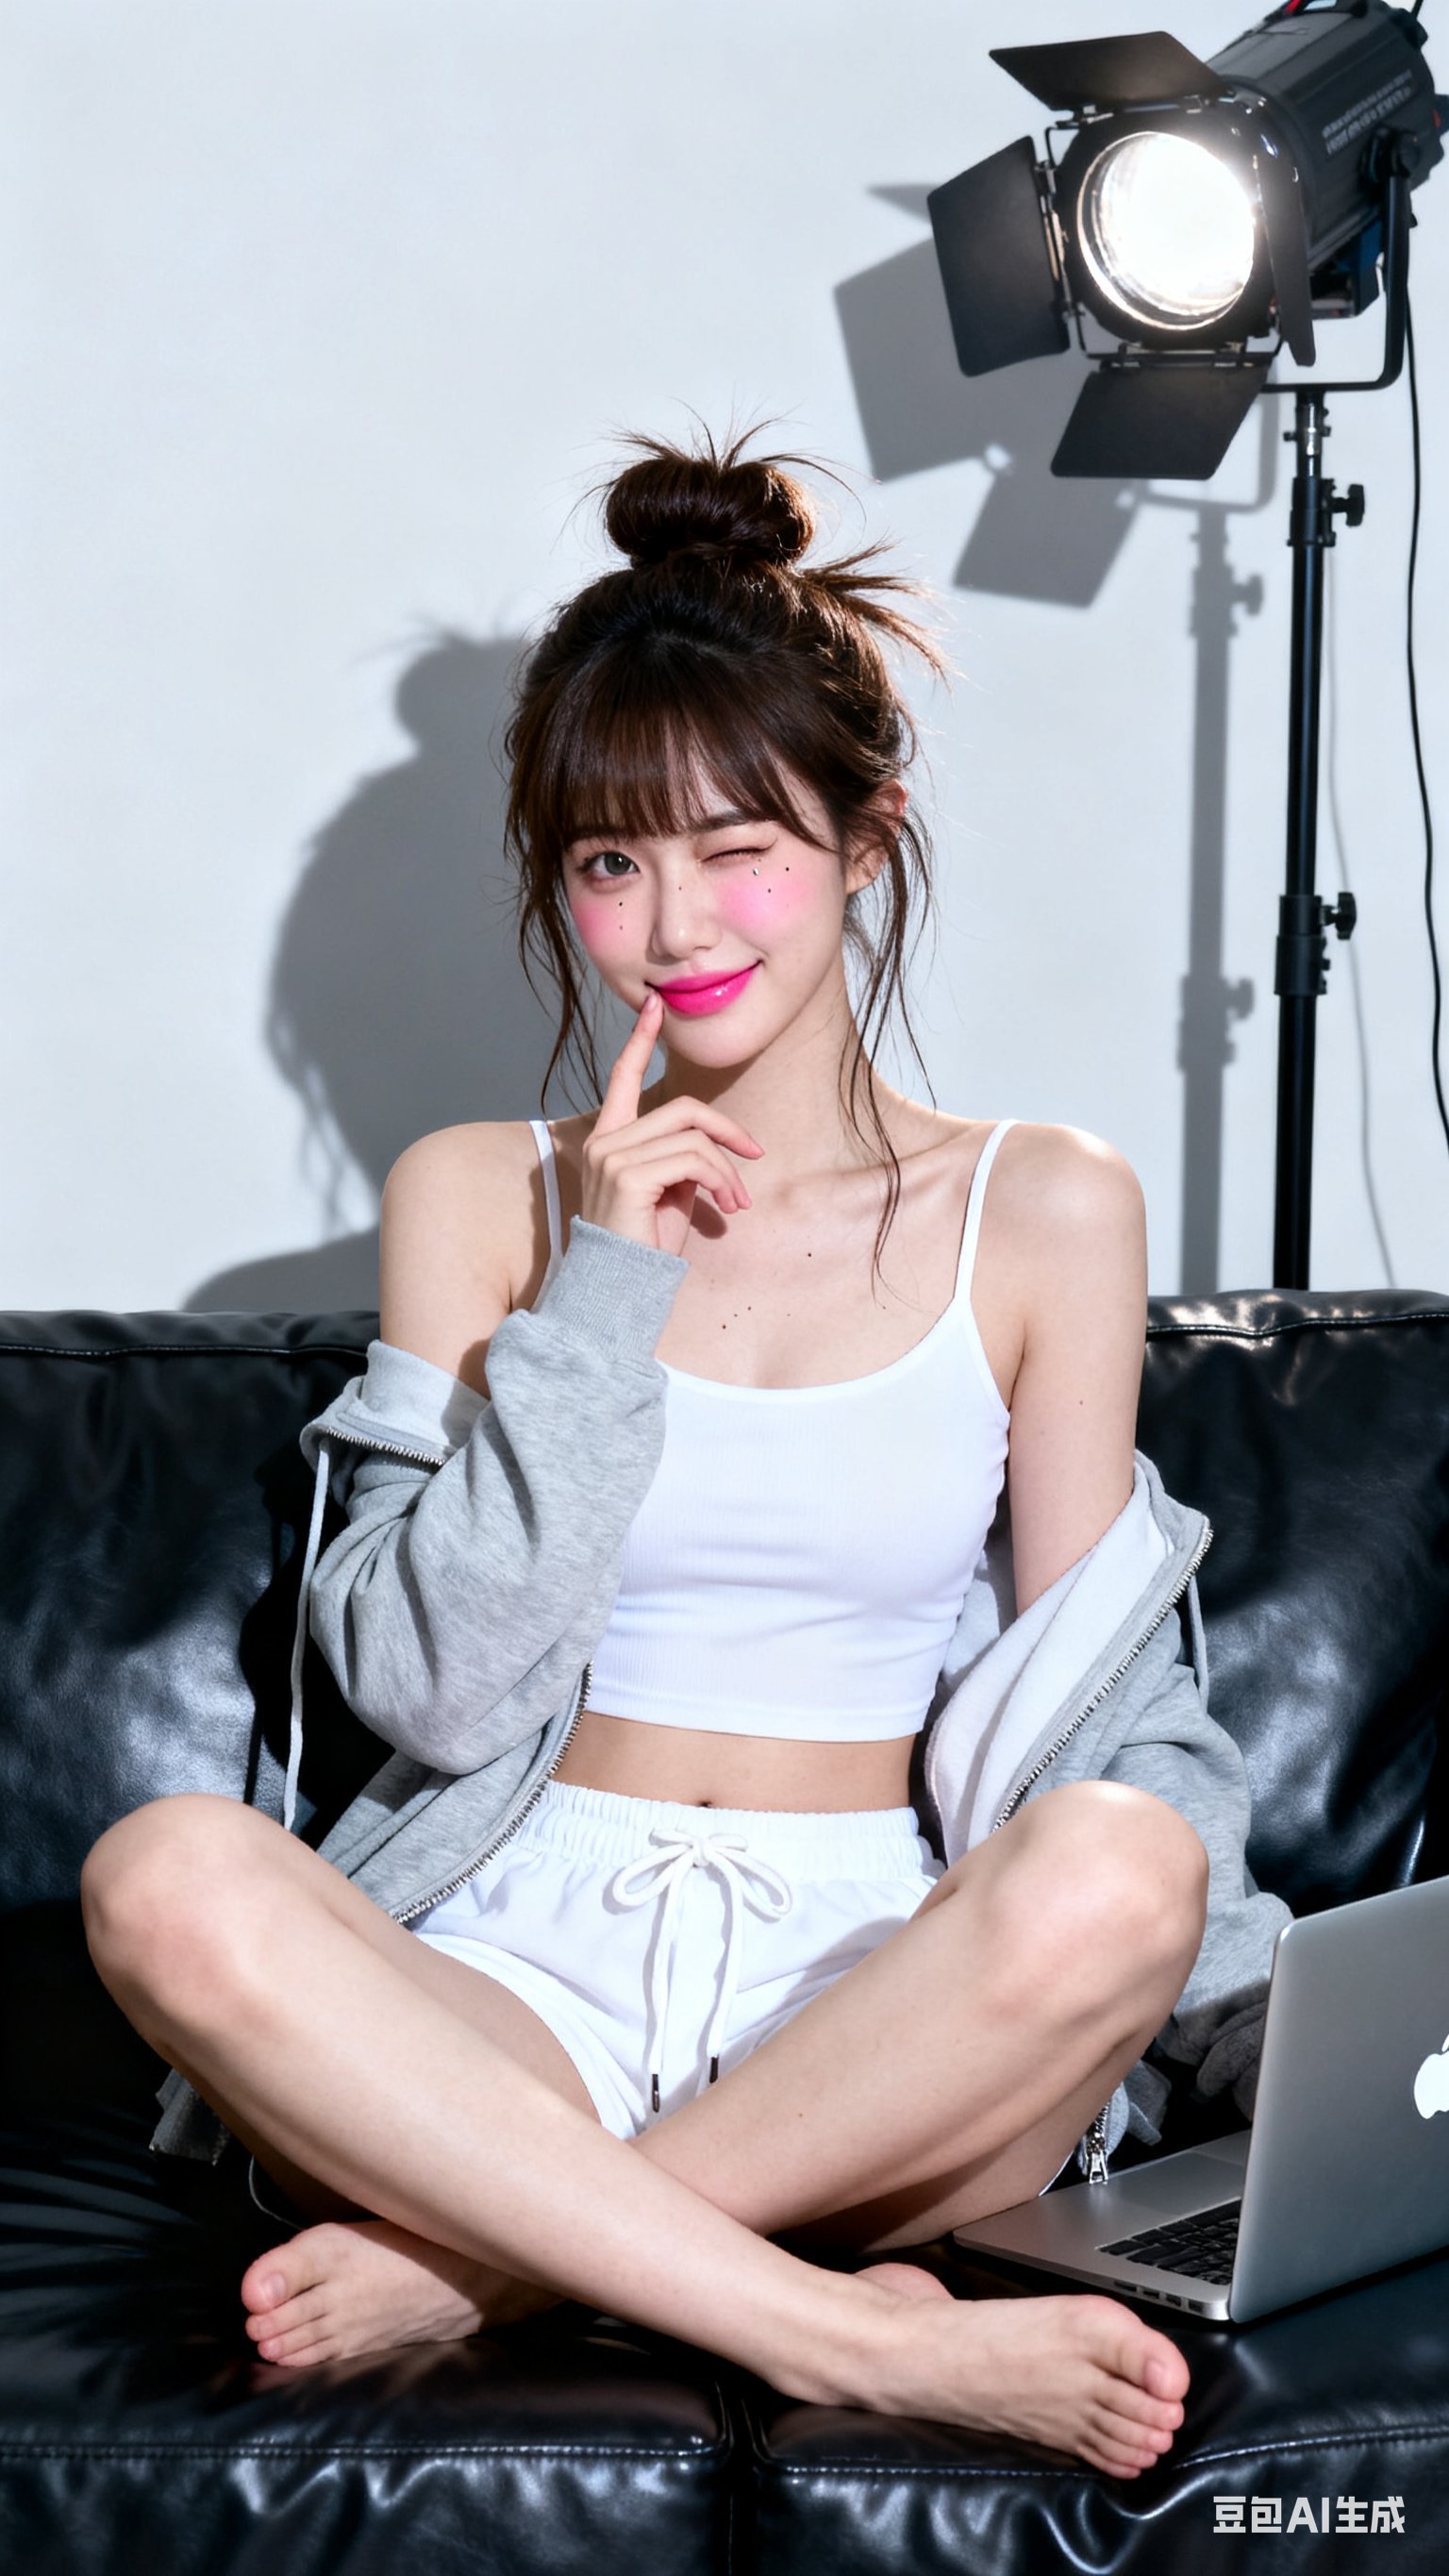
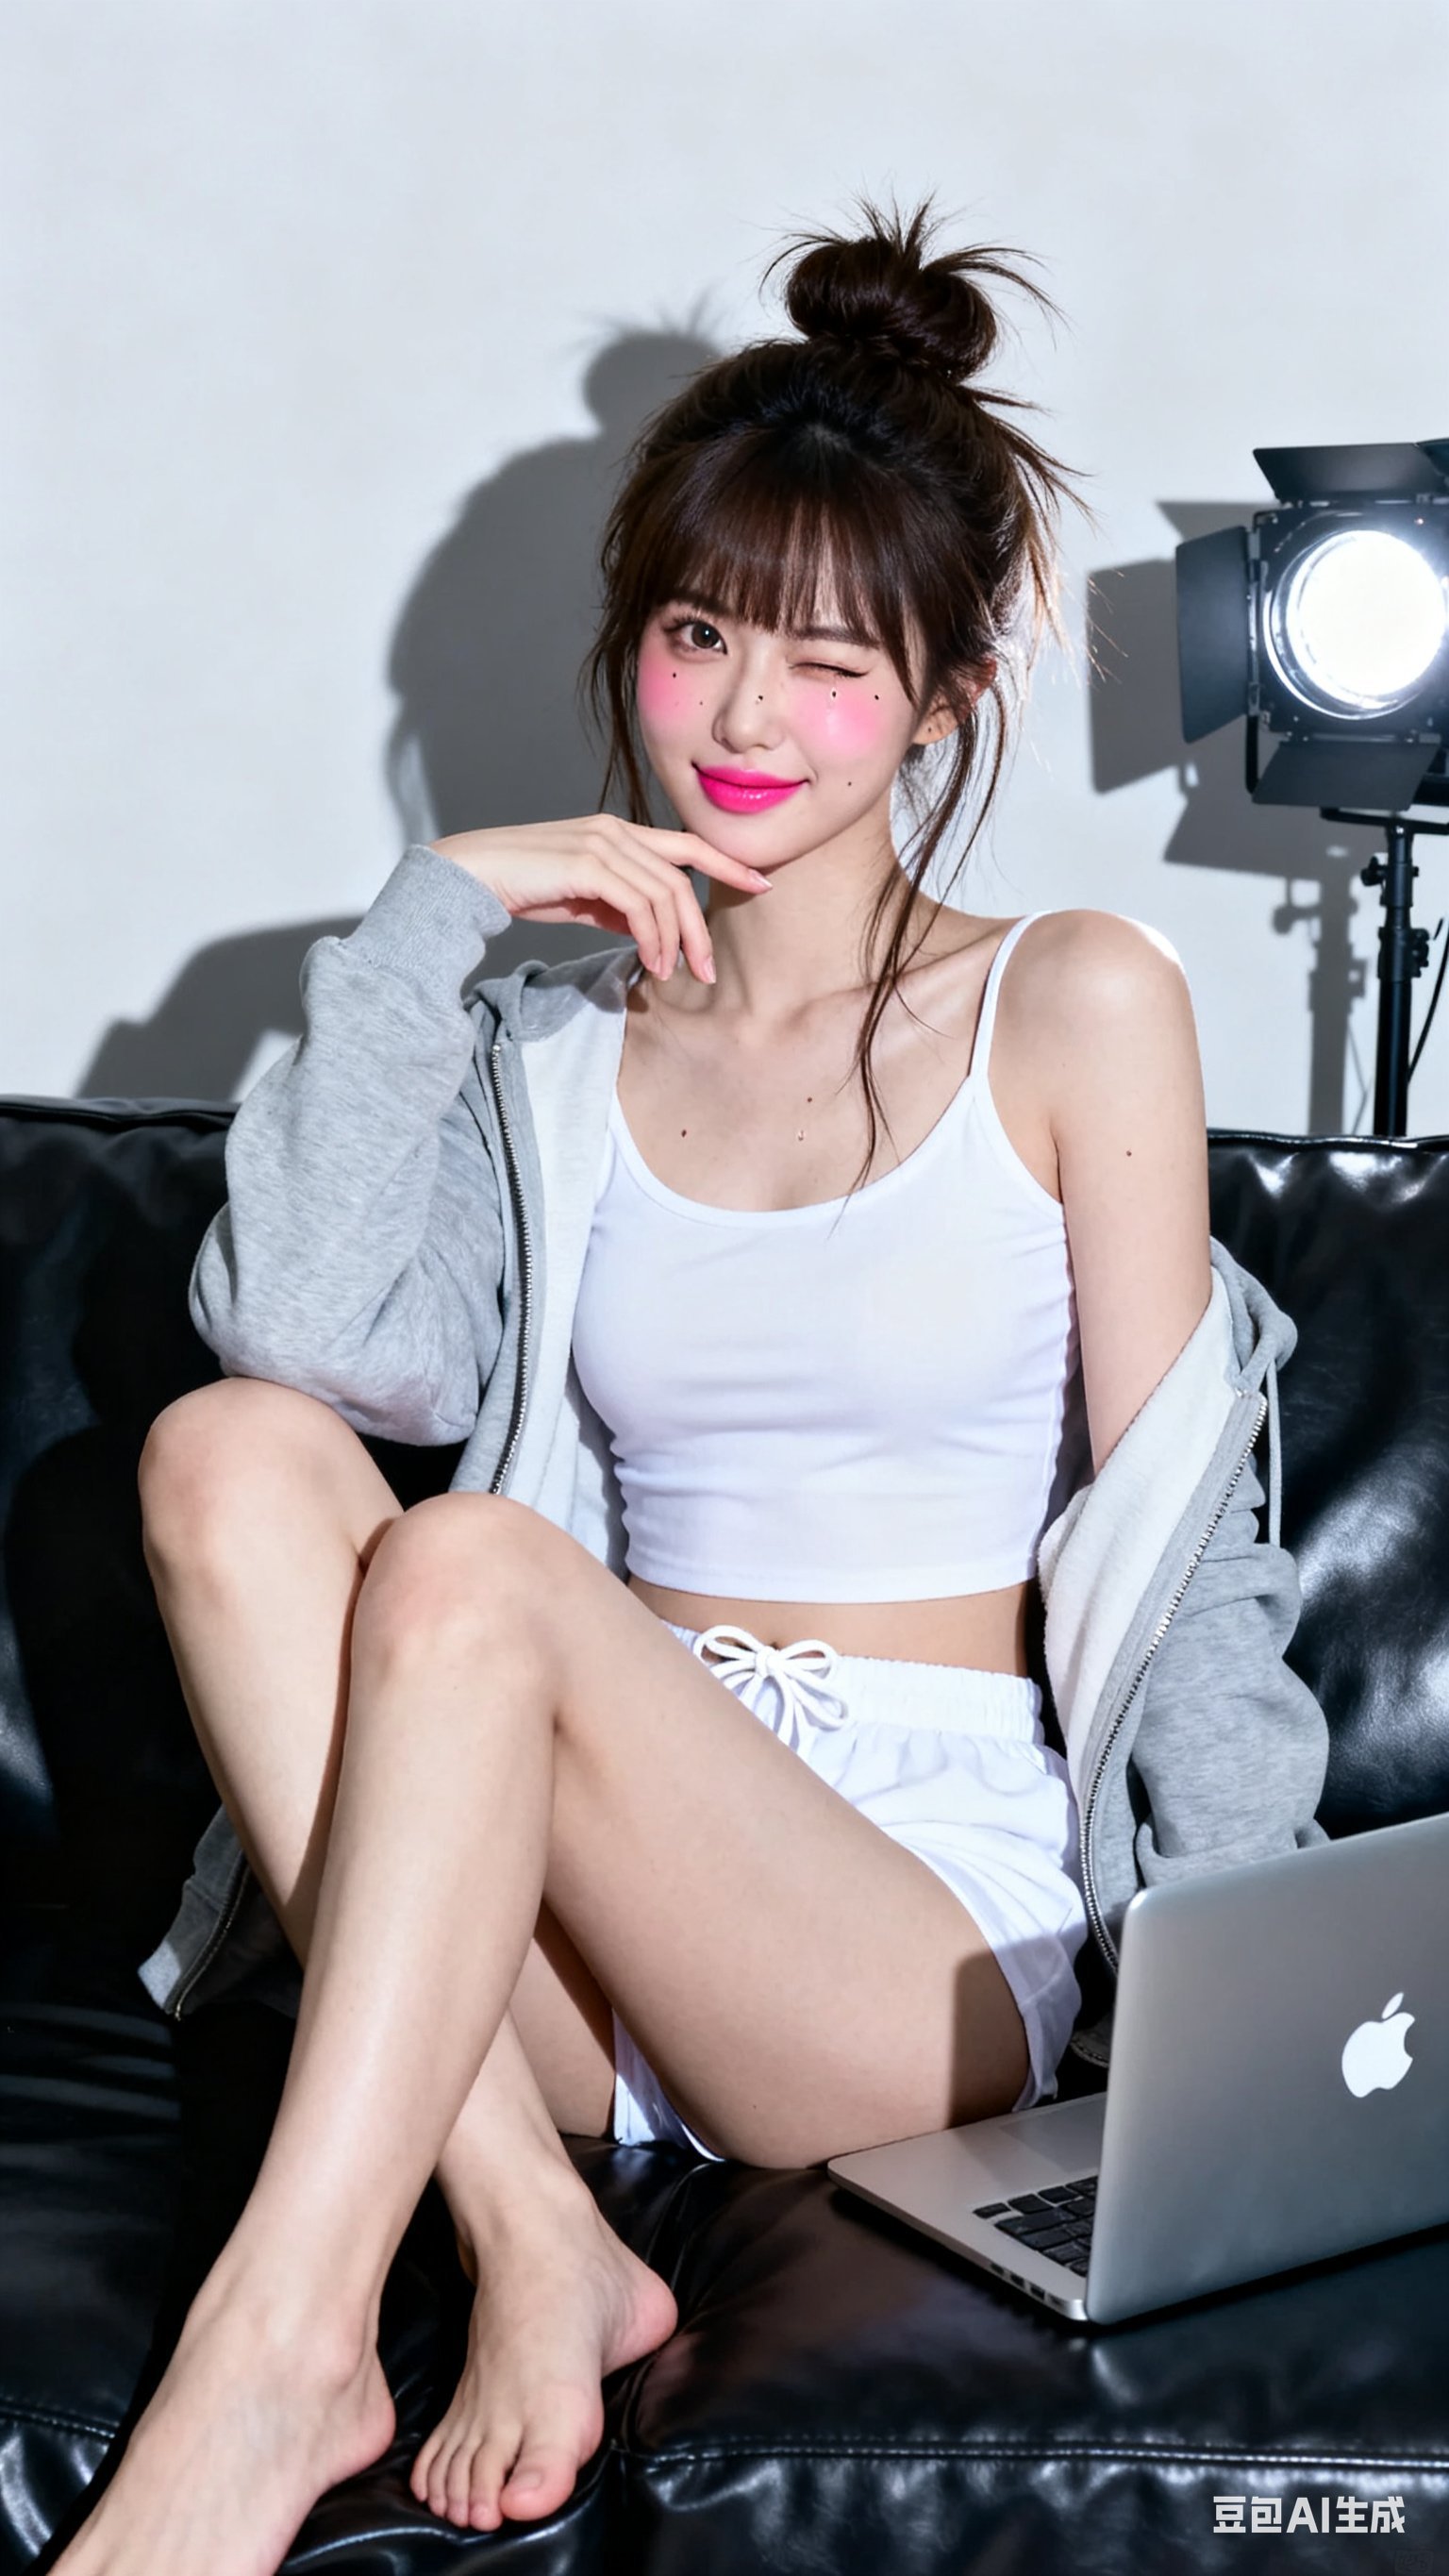
All these images were generated using the same prompt template. Yes, you read that right, a reusable “recipe.”
Why Do Your Prompts Always Fail?
Imagine ordering coffee at Starbucks:
Beginner’s way: “Give me a coffee” (Result: random, could be Americano or latte) Pro’s way: “Grande oat milk latte, half sweet, extra ice, extra shot” (Result: precision hit)
AI image generation works the same way. The difference is whether you’ve mastered this set of “professional jargon.”
So-called “Prompt Engineering” is simply learning to use language that AI understands to translate the images in your mind.
6-Layer Structure to Build Your Prompt Framework
I imagine prompts as building blocks, with each layer serving a specific function. Like building a house - foundation first, then framework, then decoration.
Layer 1: Style Definition (Style) - Determines the Image’s “Flavor”
Just like cooking starts with choosing a cuisine (Sichuan, Cantonese), AI image generation must first set the style tone.
Combat Code:
"Style": "High-key studio, direct flash aesthetics, East Asian social media style (e.g., Ulzzang, TikTok), stylized beauty retouching"
Translated into plain language: “Give me that Instagram-filtered vibe, with professional studio quality, add some Korean Ulzzang flavor, and remember to turn on beauty filters.”
These keywords are like navigation waypoints. AI searches its database for visual elements matching these features and fuses them together.
Layer 2: Subject Shaping (Subject) - The Image’s “Protagonist”
This is the core of the entire prompt and the most detail-intensive part.
Imagine describing someone’s appearance to the police - how would you say it?
Vague version: “A young girl” Precise version: “East Asian features, around 20 years old, slim build, long hair in messy bun, wearing white cami and gray hoodie”
AI is like the police - more details means better restoration of what you want.
Our template breaks “Subject” into three sub-modules:
Body Part:
"Posture": "Relaxed on sofa, casual sitting",
"Pose": "Sitting, legs crossed and tucked in front",
"Hand gesture": "Right hand raised, fingers slightly curved, knuckles gently supporting chin and cheek",
"Head tilt angle": 5
See that? “Head tilt angle: 5” - this kind of numerical description is like sending GPS coordinates to a delivery driver, ten thousand times more precise than “head slightly tilted.”
Facial Details:
"Expression": "Playful, charming",
"Gaze": "Right eye directly at camera",
"Eye action": "Left eye winking",
"Skin tone": "Extremely white porcelain skin (brightening aesthetics)",
"Feature": "Small beauty mark below left eye"
Here’s a trick: “Left eye winking” + “Small beauty mark below left eye” - these details are most easily overlooked by AI, but because they’re rare, once generated they add special charm.
Makeup Breakdown:
"Makeup": "Stylized Korean/TikTok makeup: flawless matte foundation, rich pink blush on upper cheeks, pink gradient lips, defined eyebrows, subtle eyeliner, emphasized aegyo sal"
Notice we list foundation, blush, lips, eyebrows, eyeliner, aegyo sal one by one with semicolons, like a makeup artist’s workflow checklist. AI will render each detail step by step.
Layer 3: Environment & Props - Supporting “Actors” Creating Atmosphere
The environment should be clean to highlight the subject. But completely blank looks too fake, that’s when props come in handy.
"Setting": "Pure white or light gray wall in front of black leather sofa",
"Props": "Silver Apple MacBook laptop, logo visible, placed on sofa to subject's right (left side of frame)"
Here’s a tip: “logo visible” adds realism while subtly conveying brand tone (Apple = refined lifestyle).
Also, “placed to subject’s right (left side of frame)” - this dual positioning prevents AI from mixing up left and right. Like giving directions to a delivery driver: “left side of entrance (right side as you face the door).”
Layer 4: Lighting - Light and Shadow are Photography’s Soul
This part is key to achieving “direct flash aesthetics.”
"Main light": {
  "Source": "Flash",
  "Modifier": "Bare bulb or direct flash (hard light)",
  "Position": "Near camera axis, slightly right and above eye level",
  "Effect": "Casts clear, dark shadows on wall behind subject; strong highlights on skin and sofa leather"
}
The key is in that last “Effect” description. We don’t just tell AI what light to use, we preview the “expected clear shadows” and “expected strong highlights.”
It’s like showing AI the “reference answer” - it will reverse-engineer the required intensity and texture.
Layer 5: Camera - Simulating a Photographer’s Perspective
These parameters simulate a professional photographer’s studio controls.
"Focal length_mm": 50,
"Aperture_f": 4.0,
"Focus": { "Target": "Near eye (right eye)", "Depth of field": "Medium" },
"Composition": { "Crop": "From mid-thigh to top of head, headroom above hair" }
50mm focal length: Closest to human eye perspective, no distortion f/4.0 aperture: Medium depth of field, subject sharp, background slightly blurred Focus on right eye: Portrait photography iron rule - eyes are the visual focus Crop with headroom: Give the image breathing space, don’t crop too tight
Layer 6: Post-processing - Simulating Retouching Effects
This layer directly determines the “social media feel.”
"Texture": "Highly smooth skin, no visible pores ('porcelain doll' or 'beauty filter' effect)",
"Sharpening": "Selective sharpening on eyes/lashes",
"Blemish control": "Complete removal of all blemishes and texture"
Note “selective sharpening” - meaning only sharpen eyes and lashes while keeping skin soft. Like Meitu’s “smooth skin + eye enhancement” feature.
Complete Template One-Click Copy
Click to expand complete JSON template (103 lines)
{
  "Style": "High-key studio, direct flash aesthetics, East Asian social media style (e.g., Ulzzang, TikTok), stylized beauty retouching",
  "Output": {
    "Color space": "sRGB",
    "Rendering intent": "Photo"
  },
  "Subject": {
    "Category": "Human",
    "Gender presentation": "Female",
    "Ethnicity": "East Asian (e.g., Korean, Chinese)",
    "Age range": "Young adult",
    "Body": {
      "Build": "Slim",
      "Proportions": "Natural human anatomy",
      "Posture": "Relaxed on sofa, casual sitting",
      "Pose": "Sitting, legs crossed and tucked in front",
      "Hand gesture": "Right hand raised, fingers slightly curved, knuckles gently supporting chin and cheek",
      "Head tilt angle": 5
    },
    "Face": {
      "Expression": "Playful, charming",
      "Gaze": "Right eye directly at camera",
      "Eye action": "Left eye winking",
      "Skin tone": "Extremely white porcelain skin (brightening aesthetics)",
      "Makeup": "Stylized Korean/TikTok makeup: flawless matte foundation, rich pink blush on upper cheeks, pink gradient lips, defined eyebrows, subtle eyeliner, emphasized aegyo sal",
      "Feature": "Small beauty mark below left eye"
    },
    "Hairstyle": {
      "Length": "Long",
      "Style": "Messy high bun with wispy bangs and loose strands",
      "Color": "Dark brown"
    },
    "Clothing": {
      "Top": "White fitted cropped cami",
      "Outer": "Light gray zip hoodie, open and slipping off shoulders",
      "Bottom": "White drawstring lounge shorts",
      "Footwear": "Barefoot"
    }
  },
  "Environment": {
    "Location": "Studio or minimalist interior",
    "Setting": "Black leather sofa in front of pure white or light gray wall",
    "Props": "Silver Apple MacBook laptop, logo visible, placed on sofa to subject's right (left side of frame)"
  },
  "Lighting": {
    "Main light": {
      "Source": "Flash",
      "Modifier": "Bare bulb or direct flash (hard light)",
      "Position": "Near camera axis, slightly right and above eye level",
      "Effect": "Casts clear, dark shadows on wall behind subject; strong highlights on skin and sofa leather"
    },
    "Fill light": "Minimal or none",
    "Ambient light": "Suppressed",
    "White balance_K": 5800
  },
  "Camera": {
    "System": "Digital camera",
    "Sensor": "Full-frame equivalent",
    "Lens": {
      "Type": "Prime",
      "Focal length_mm": 50
    },
    "Exposure": {
      "ISO": 100,
      "Aperture_f": 4.0,
      "Metering": "Bright exposure, high-key aesthetics"
    },
    "Focus": {
      "Target": "Near eye (right eye)",
      "Depth of field": "Medium"
    },
    "Composition": {
      "Orientation": "Vertical",
      "Crop": "From mid-thigh to top of head, headroom above hair",
      "Angle": "Eye level",
      "Layout": "Subject centered"
    }
  },
  "Color grading": {
    "Look": "Bright, clean, slightly cool-toned",
    "Contrast": "High",
    "Saturation": "Medium, pink tones emphasized"
  },
  "Post-processing": {
    "Noise reduction": "High",
    "Texture": "Highly smooth skin, no visible pores ('porcelain doll' or 'beauty filter' effect)",
    "Sharpening": "Selective sharpening on eyes/lashes",
    "Blemish control": "Complete removal of all blemishes and texture"
  }
}
Combat Tips: 3 Tricks to Double Your Results
1. The Magic of Numerical Values
Don’t say “head slightly tilted,” say “head tilt angle: 5.”
Like navigation software - “turn left ahead” isn’t as precise as “turn left in 50 meters.” AI processes numbers much better than adjectives.
Other places to use numbers:
- Age: Don’t say “young,” say “20-25 years old”
- Aperture: Don’t say “background blur,” say “aperture f/2.8”
- Saturation: Don’t say “vibrant colors,” say “saturation +20%”
2. Relative Position Description
“Placed to subject’s right (left side of frame)” - this dual positioning avoids AI confusing left and right.
Because AI’s understanding of “left/right” could be from its perspective or the subject’s perspective. Adding a parenthetical note greatly reduces failure rate.
Similar dual positioning:
- “Camera left (subject’s right)”
- “Foreground (near lens)”
- “Background (wall direction)”
3. Effect Preview is Important
Don’t just say what equipment to use, say the expected effect.
Normal description: “Use flash” Advanced description: “Use flash, casting clear, dark shadows on background wall”
It’s like showing AI the “reference answer” in advance - it will reverse-engineer the needed parameters.
Common Problem Pitfall Guide
Q: Why are my images never refined enough?
A: Remember to add post-processing parameters, especially “beauty filter effect” for social media characteristics.
Many people only write shooting parameters and ignore post-processing. But 80% of social media photo quality comes from post-processing.
Q: Which is better, Gemini or Doubao?
A: Each has strengths.
- Gemini: More precise details, better understanding of professional terms, suitable for photography-focused creation
- Doubao: More natural beauty effects, better understanding of Chinese context, faster generation speed
Try both and see which suits your needs better.
Q: Can the JSON format be simplified?
A: Yes, but results will suffer.
If you just want quick output, keep only “Style” + “Basic subject info” + “Lighting effects” - these three core modules.
But if you want precise control of every detail, the complete JSON structure is necessary.
Q: Why does the same prompt generate different images each time?
A: This is AI’s randomness and also its charm.
If you want more stable results:
- Add more detail descriptions to narrow AI’s creative space
- Use fixed random seed (some tools support this)
- Generate several and pick the most satisfying one
Next Steps
Alright, theory’s done - time for you to get hands-on.
Get Started Now (3-minute generation)
- Copy template: Click the collapse box above, copy the complete JSON
- Modify parameters: For example, change “messy bun” to “twin tails,” “cami” to “T-shirt”
- Feed into AI tool: Gemini or Doubao works, generate your first creation
- Adjust and optimize: Compare results, fine-tune parameters until satisfied
Worth Sharing?
If this article helped you solve AI image generation failures, please:
- Like and save: Convenient for future template reference
- Share with friends: Help more people master control techniques
- Post in comments: Share your generation results, I’ll feature excellent works
- Ask questions: I’ll help you solve problems you encounter
Your shares and interactions are my motivation to keep creating!
Join Beast Code Community
Follow “Beast Code” for more AI programming and creation tutorials:
- AI image generation advanced series (different style template breakdowns)
- Prompt engineering practical cases
- AI-assisted programming techniques
- Frontend technology deep dives
See you in comments: Share your first AI creation, tell us your control insights, let’s exchange ideas.
Follow me: More practical tutorials coming - from “landscapes” to “anime,” from “realism” to “illustration,” teaching you control step by step.
Remember: AI image generation isn’t magic, it’s a learnable skill.
Master this methodology and you can control every detail like a bartender mixing cocktails. Say goodbye to “random generation” and enter the era of “precision control.”
Now it’s your turn. Go create something, then come back and tell me in the comments!